

Introduction
If you're a developer using a Mac, chances are you've spent a fair amount of time working with the command line. While it's a powerful tool for running scripts and managing your system, it can often be a bit intimidating and lacking in visual appeal. That's where this tutorial comes in - I'll show you how to configure your macOS command line tools to create a more enjoyable and productive experience. From setting up package managers to customizing your terminal's appearance, you'll learn how to make the command line work for you. Whether you're a seasoned developer or just getting started, this tutorial will help you take your command line game to the next level.
Mac Command Line Tools
Before we install and configure other tools, you'll need to install the command line tools for Mac. The command line tools for Mac are essential software components that enable developers and power users to interact with the macOS operating system through a terminal window. These tools provide a powerful set of command-line utilities, such as compilers, text editors, and system tools, that can be used to perform various tasks like software development, system administration, and automation. These are a prerequisite for many of the other tools we plan to install. Without these tools, you won't be able to run many of the command-line utilities you need to perform various tasks on your system. Once installed, you'll have access to a powerful set of tools that will enable you to work more efficiently and effectively on your Mac.
Installing the command line tools is a simple process that can be done through the Terminal app or by downloading the Xcode IDE from the Mac App Store. In this tutorial, we'll be installing the command line tools for Mac via the Terminal app instead of installing Xcode from the Mac App Store. While Xcode includes the command line tools, it's a large application that may take up unnecessary disk space if you're not using it for development. Additionally, some users may prefer to install only the command line tools without installing the entire Xcode IDE. If you would like XCode as well, install it from the App Store or the Apple website.
To open the default Terminal app on macOS, you can follow these steps:
- Click on the
Findericon on the dock or from the Applications folder. - In the
Finderwindow, click onApplicationsin the left sidebar. - Scroll down and find the
Utilitiesfolder, then click to open it. - Inside the
Utilitiesfolder, find theTerminalapp icon and double-click it.
Alternatively, you can use Spotlight search by pressing Command + Space, then typing Terminal in the search bar and pressing Enter to open the app. Once the Terminal app is open, you can start typing commands and interacting with the command line.
Once the Terminal app is open, enter the following command to install the command line tools for Mac.
xcode-select --installPackage and Dependency Management
Next, we will be installing Homebrew.
The Missing Package Manager for macOS (or Linux)
Homebrew is a powerful and user-friendly package manager that allows you to easily install and manage command line utilities, libraries, and applications on your Mac. It simplifies the installation process by automatically managing dependencies and keeping your software up-to-date. Additionally, Homebrew provides access to thousands of open-source packages, making it an essential tool for developers and power users who frequently work on the command line. By installing Homebrew, you'll have access to a vast array of tools that can help streamline your workflow and increase your productivity on the command line.
Enter the following command to download and install Homebrew.
/bin/bash -c "$(curl -fsSL https://raw.githubusercontent.com/Homebrew/install/HEAD/install.sh)"Run these two commands in your terminal to add Homebrew to your PATH environment variable.
Make sure you replace <ADD_YOUR_USER_HERE> with your system username in the path below to your .zprofile before running the command.
(echo; echo 'eval "$(/opt/homebrew/bin/brew shellenv)"') >> /Users/<ADD_YOUR_USER_HERE>/.zprofile
eval "$(/opt/homebrew/bin/brew shellenv)"
Check to make sure the installation was successful.
# Check to make sure brew is in your PATH env var
echo $PATH

# Check to ensure Homebrew is running correctly
brew doctor
Below are some useful Homebrew commands.
# Update the index of available packages
brew update

# Search
brew search <package>

# Install command to add command-line software to your Mac.
brew install <package>

# Install graphical software binaries
# (instead of downloading a .dmg and dragging it to /Applications).
brew cask install <package>
Run brew help to get started and checkout the docs for further information on installing and updating packages.
Terminal Customization
The next section of this tutorial will focus on terminal customization, including how to install a terminal emulator, configure your shell, and customize your fonts and themes. We'll be using iTerm2 as our terminal emulator and Oh My Zsh as our shell configuration framework. I'll show you how to install and set up these tools, as well as how to customize your terminal's appearance to fit your preferences.
It's worth noting that the default shell for macOS is now zsh, a popular Unix shell that's similar to bash but with additional features and improvements. A shell is a program that interprets and executes commands entered by the user, while a terminal emulator is the application that displays the shell and provides a user interface for interacting with it. By customizing your shell and terminal emulator, you can make your command line experience more productive, efficient, and visually appealing.
Terminal Emulator
Let's install iTerm2, a powerful and highly customizable terminal emulator for macOS. iTerm2 is an excellent alternative to the default Terminal app on macOS, offering many additional features and customization options, such as split panes, hotkey window activation, and advanced search. Additionally, iTerm2 supports many useful plugins and integration with other tools, making it a popular choice for developers and power users who spend a lot of time on the command line.
Use the following Homebrew command to install iTerm2.
brew install --cask iterm2There are alternatives to iTerm2. If you are interested in other Terminal emulators, you may want to take a look at Hyper.
Terminal Configuration
Configuring and customizing your zsh shell can be a time-consuming and error-prone process. Oh My Zsh simplifies this process by providing a framework for managing your zsh configuration, with many useful features and plugins built-in, such as auto-completion, syntax highlighting, and a wide variety of plugins and themes that can help make your shell experience more enjoyable and productive. It's also highly customizable and allows for easy installation and management of external plugins and themes.
Now that we've installed iTerm2, we no longer need to use the built-in Terminal app on macOS. Instead, we'll be using iTerm2 for the remainder of this tutorial. To open iTerm2, simply type iTerm2 into Spotlight (Cmd+Space) and press enter, or open it from your Applications folder. Once iTerm2 is open, you'll see a new terminal window with a default zsh shell prompt. From here, we'll be able to start configuring our shell and customizing our terminal emulator.
Within iTerm2, install Oh My Zsh by executing the following command.
sh -c "$(curl -fsSL https://raw.githubusercontent.com/ohmyzsh/ohmyzsh/master/tools/install.sh)"Theme
Themes are an essential part of customizing your terminal emulator and can significantly improve your command line experience. Themes allow you to change the appearance of your terminal window, including font style and color schemes, making it easier to read and more visually appealing. Additionally, themes can also include useful information, such as the current directory, git branch, or system status, which can be displayed directly in the shell prompt.
In this tutorial, we'll be using Powerlevel10k, a highly customizable theme for Oh My Zsh that offers many advanced features and options. Powerlevel10k allows you to fully customize your shell prompt, with support for icons, Unicode characters, and dynamic segments that can display information such as battery level, time, and system load. Powerlevel10k also includes a configuration wizard that makes it easy to set up and customize your shell prompt to your liking. With Powerlevel10k, you can create a personalized and informative shell prompt that's tailored to your needs and preferences.
Install Powerlevel10k by executing the following line.
git clone --depth=1 https://github.com/romkatv/powerlevel10k.git ${ZSH_CUSTOM:-$HOME/.oh-my-zsh/custom}/themes/powerlevel10kEdit your ~/.zshrc file by setting the ZSH_THEME to Powerlevel10k as follows.
ZSH_THEME="powerlevel10k/powerlevel10k"Execute the following command to replace the current shell process with a new process and apply the new theme.
exec zshThis should start the Powerlevel10k configuration wizard, but if not type p10k configure to begin. Below are the settings I chose, but you can configure this to your preference.
| Setting | My Preference |
|---|---|
| Install Meslo Nerd Font? | (y) Yes (recommended) Note: If you choose yes, you will need to close and reopen iTerm2. |
| Does this look like a diamond (rotated square)? | (y) Yes Note: This is a configuration test of your system. For me this was a yes, but answer as to what you see. |
| Does this look like a lock? | (y) Yes Note: This is a configuration test of your system. For me this was a yes, but answer as to what you see. |
| Does this look like a Debian logo (swirl/spiral)? | (y) Yes Note: This is a configuration test of your system. For me this was a yes, but answer as to what you see. |
| Do all these icons fit between the crosses? | (y) Yes Note: This is a configuration test of your system. For me this was a yes, but answer as to what you see. |
| Prompt Style | (3) Rainbow |
| Character Set | (1) Unicode |
| Show current time | (3) 12-hour format |
| Prompt Separators | (1) Angled |
| Prompt Heads | (1) Sharp |
| Prompt Tails | (1) Sharp |
| Prompt Height | (2) Two lines |
| Prompt Connection | (1) Disconnected |
| Prompt Frame | (2) Left |
| Frame Color | (4) Darkest |
| Prompt Spacing | (2) Sparse |
| Icons | (2) Many icons |
| Prompt Flow | (1) Concise |
| Enable Transient Prompt | (n) No |
| Instant Prompt Mode | (1) Verbose |
| Apply changes to ~/.zshrc? | (y) Yes (recommended) |
Powerlevel10k is a fork of the popular Powerlevel9k theme for Oh My Zsh. While Powerlevel9k is still a powerful and customizable theme, Powerlevel10k offers many additional features and optimizations, making it a more efficient and flexible option. Powerlevel10k uses a faster and more efficient engine for rendering the shell prompt, which reduces lag and improves performance. It also includes a simplified configuration process and many new features, such as dynamic segments and improved git integration. While Powerlevel9k is still a viable option for customizing your shell prompt, I recommend using Powerlevel10k for the best experience.
Colors
We'll be using the Night Owl color theme by Sarah Drasner to customize the appearance of iTerm2. This color theme was originally created for Visual Studio Code and has since been adapted for use in iTerm2. The Night Owl theme is a dark, high-contrast theme that's easy on the eyes and provides excellent readability. It features a mix of blues, greens, and purples that give your terminal a unique and professional look.
To install the Night Owl theme, you'll need to download the iTerm2 version from this GitHub repository. Once you've downloaded the theme, open iTerm2 Preferences and navigate to the Profiles tab. From there, select the Colors tab and click on the Color Presets dropdown. Choose Import and select the downloaded Night Owl theme file. Once imported, select the Night Owl theme from the Color Presets dropdown.
Finally, we'll add some transparency to the terminal window to make it a bit more visually appealing. To do this, go to iTerm2 Preferences > Profiles > Window and set the Transparency to around 10%. This will give your terminal a slightly transparent look that adds a nice touch to the overall appearance.
Fonts
During the Powerlevel10k setup wizard, we installed the Meslo Nerd Font. Additionally, I recommend making some changes to the text settings in iTerm2 Preferences. Go to Preferences > Profiles > Text and change the font size to 12. This is completely optional, but I find that this setting allows more text in smaller window sizes. Some prefer larger font sizes that are more legible and comfortable to read. Do what works for you!
While you're in the Text preferences, check the box that says Use ligatures if it's not already checked. Ligatures are special characters that combine two or more characters into a single glyph, which can make the text easier to read and more visually pleasing.
Plugins
Oh-My-Zsh comes with a wide range of plugins that can add additional functionality to your shell, including things like aliases, auto-completion, and syntax highlighting. All of the plugins that come pre-installed with Oh-My-Zsh can be found on the official plugins GitHub page at https://github.com/robbyrussell/oh-my-zsh/tree/master/plugins. These plugins are located in the ~/.oh-my-zsh/plugins directory on your system.
If you want to add a custom plugin to your shell, you can do so by creating a new directory for the plugin in the ~/.oh-my-zsh/custom/plugins directory. Once you've added the plugin, you can enable it by adding it to the list of plugins in your ~/.zshrc file. That may look something like this.
# ...

plugins=(
  bgnotify
  colored-man-pages
  docker
  fasd
  fzf
  git
  github
  gitignore
  zsh-autosuggestions
  zsh-syntax-highlighting
)

# ...
Some plugins require additional configuration. Make sure to read the plugin documentation.
There are shell plugin managers to ease and help manage ZSH plugins. If interested, below are a few of the more popular ones.
- Antigen is a plugin manager for zsh, inspired by oh-my-zsh and vundle.
- Antibody is a shell plugin manager made from the ground up thinking about performance.
- zgen is a lightweight plugin manager for Zsh inspired by Antigen.
- zplug is a next-generation plugin manager for zsh.
It's important to note that adding too many plugins can slow down your shell startup time, so I recommend being selective and only adding the plugins that you really need. With the right selection of plugins, you can significantly improve your productivity and make your shell experience even more enjoyable.
Utilities
In the final section of this tutorial, we will cover some useful command line utilities and shell integration apps that can help streamline your workflow even further. These utilities can be used to automate repetitive tasks, manage files and directories, provide autocompletion, and more.
LSD
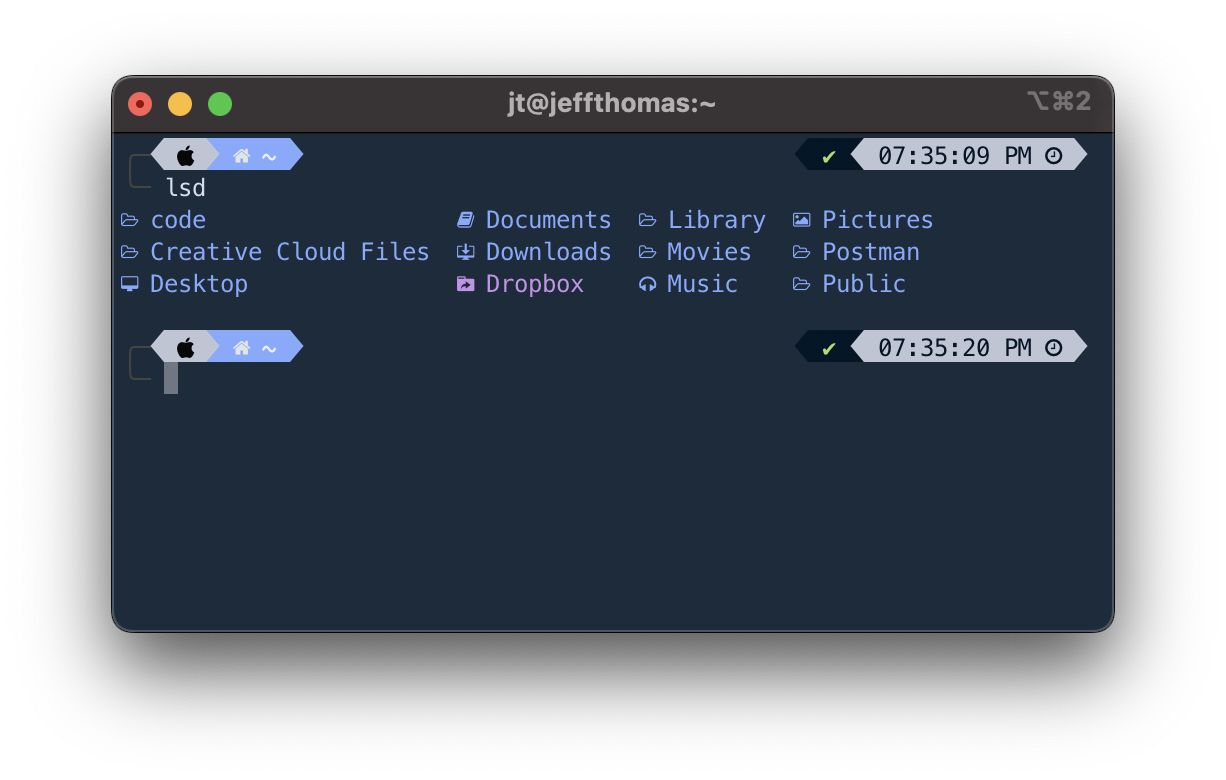
One of the command line utilities that we will cover in this tutorial is called LSD (LSDeluxe), which is a modern and colorful replacement for the traditional ls command. LSD adds some extra features to ls, such as icons, file type coloring, and Git status information, all while being faster and more customizable than the default ls command. With its clean and colorful output, LSD makes it easy to navigate through directories and quickly identify file types. Additionally, LSD can be easily customized using themes and configuration files, allowing you to tailor its appearance and functionality to your liking. Overall, LSD is a great utility to have in your command line toolkit, especially if you work with files and directories frequently.
Even though LSD (the utility) may have some trippy colors, it's not like the psychedelic drug LSD in any other way!
Let's install LSD by executing the following command.
brew install lsdEdit your ~/.zshrc file to replace the default ls command with lsd by adding an alias. While there, let's add a few other useful aliases, too.
alias zshconfig="vi ~/.zshrc"
alias ohmyzsh="vi ~/.oh-my-zsh"
alias ls='lsd'
Execute the following command to replace the current shell process with a new process and apply the aliases.
exec zshWhen you type ls in iTerm2, you should now see the styled output from the LSD utility.
If the aliases are not working after replacing the current shell or restarting iTerm2, ensure that the aliases are declared after any source lines, so they're not being overwritten. We will install Fig next, which needs to be last in your .zshrc file. If there are any conflicts, you can also configure aliases from within Fig itself.
Fig
Fig is a shell integration app that brings autocomplete to your terminal commands. It provides interactive suggestions as you type, helping you complete long and complex commands much faster. It also offers documentation and examples for commands, so you can quickly learn and master them.
Fig can be installed via Homebrew, or you can download the binary from the official website. To install Fig via Homebrew, execute the following command.
brew install figOnce installed, you can configure Fig to work with your preferred shell (bash, zsh, fish, etc.) and start enjoying its autocomplete capabilities. Configure Fig to use iTerm2 by navigating to Settings > General and setting the Preferred Terminal to iTerm2. You can test Fig by changing directories using the cd command and seeing the autocomplete pop up.
You can also configure Fig's theme to match the Night Owl theme we used within iTerm2, by navigating to Settings > Autocomplete > Appearance and setting Theme to Nightowl.
fig doctor to automatically debug / self-heal any issues.UPDATE: June 1, 2024
Effective September 1, 2024, Fig will be sunsetting and access will be terminated. Users are encouraged to migrate to Amazon Q for command line functionality. Amazon Q is free on the Individual tier and is designed to be faster and more reliable than Fig. To ensure a seamless transition, users can upgrade to Amazon Q directly from the Fig dashboard.
Summary
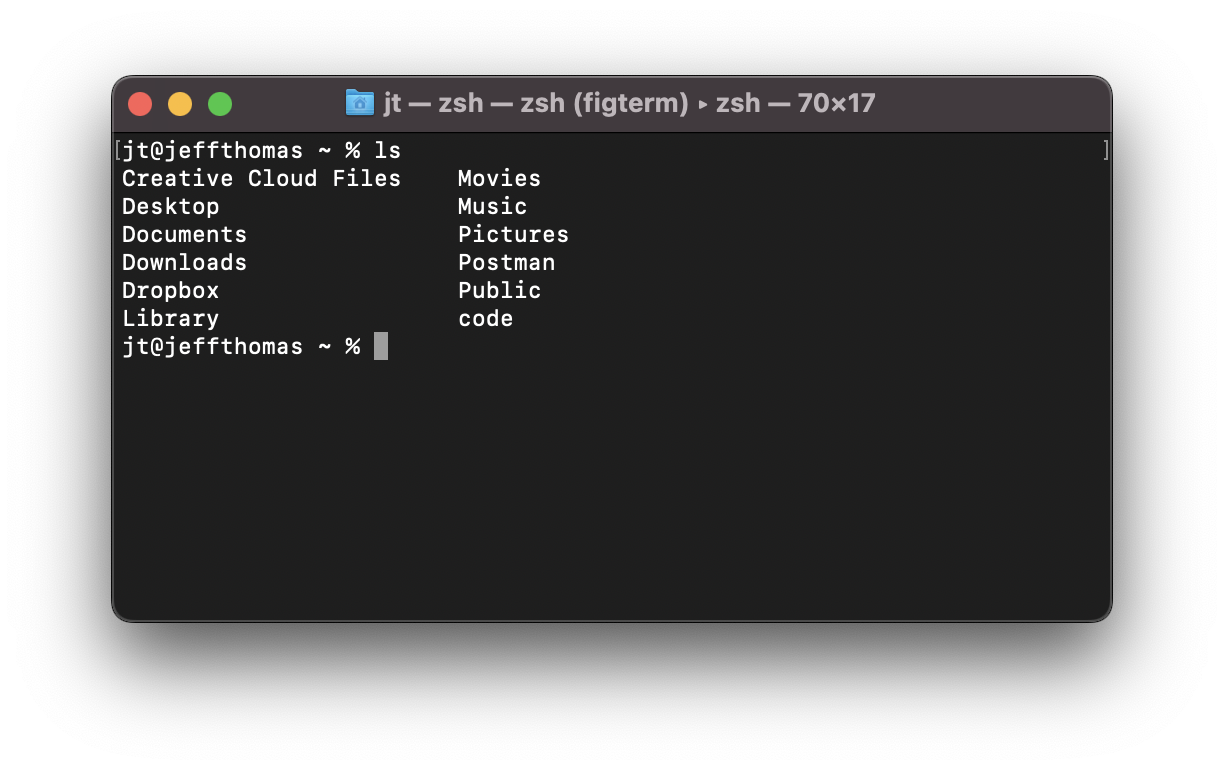
In this tutorial, we learned how to configure the macOS terminal, including installing Homebrew - the missing package manager for Mac, customizing the terminal using iTerm2 and Oh-My-Zsh, and installing plugins and utilities to make the shell experience more pleasant and productive. We also installed the Powerlevel10k theme, the Night Owl color theme for iTerm2, and the Meslo font. Your terminal has now been transformed from a boring black and white screen into a beautiful and productive environment!
Overall, this tutorial showed that the command line can be a powerful and customizable tool for macOS users. By using tools like Homebrew, iTerm2, and Oh-My-Zsh, users can streamline their workflows and get more done with less effort. If you want to learn more, check out the following links:
- Command Line Power User: A free video series on configuring and using modern command line power user tools.
- You can find my dotfiles here and on GitHub. Feel free to take a look and use any parts of them that you find useful.
For the Windows users out there, you may find the following links useful.
- How to make the ultimate Terminal Prompt on Windows 11 - This video is LONG and WORDY and DETAILED by Scott Hanselman
- Cmder is a portable console emulator for Windows.
See the associated LinkedIn post.
Comments
To leave feedback or questions, simply login using your preferred social network. I will read and answer your comments promptly, but please keep in mind that they will be public.